Best Practices for Pipeline Excavation: Inspection and Defect Assessment
Introduction
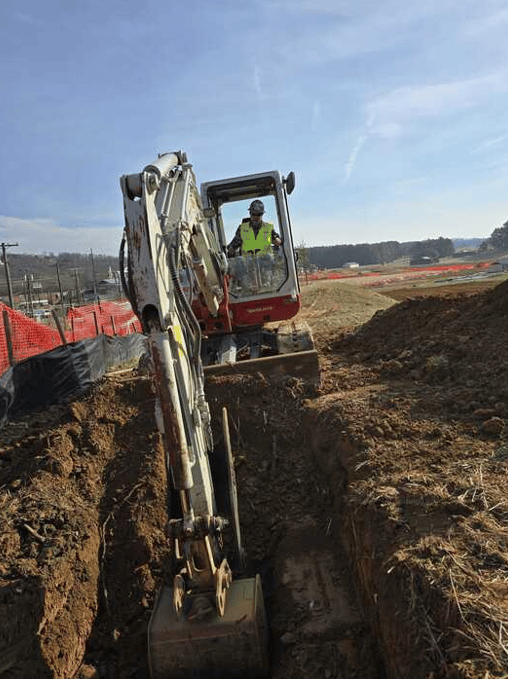
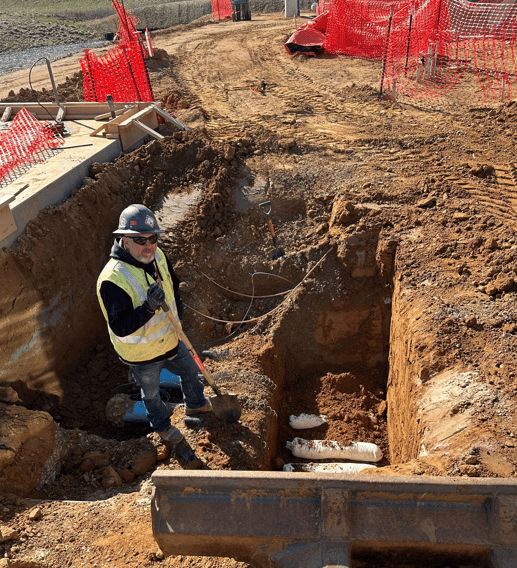
In the world of pipeline integrity management, few opportunities are as valuable as when a buried or submerged pipeline is exposed during excavation. Whether it's for maintenance, repairs, or unexpected discoveries, this moment allows technicians to directly assess the condition of the pipe, coating, and surrounding environment. Proper inspection during excavation not only helps identify corrosion or defects early but also ensures compliance with regulatory standards and enhances overall system reliability. This article explores best practices for handling pipeline excavations, focusing on what data to gather, what to look for, and how to conduct a thorough assessment. By following a structured approach, corrosion technicians can make informed decisions that prioritize safety and longevity.
Understanding the Importance of Excavation Inspections
Pipelines are the lifelines of industries like oil and gas, transporting essential resources over vast distances. However, buried pipelines are susceptible to external and internal corrosion due to soil conditions, moisture, and environmental factors. When a pipeline is excavated (intentionally or otherwise) it's a regulatory requirement in many jurisdictions to inspect the exposed sections for signs of corrosion. This isn't just about spotting visible issues; it's about collecting data that can inform broader integrity management strategies.
External corrosion, for instance, often stems from coating failures or inadequate cathodic protection, while internal corrosion might result from product contaminants or microbial activity. Defect assessment goes beyond corrosion to include mechanical damage, manufacturing anomalies, and cracks. A systematic inspection helps determine if repairs are needed and what methods are appropriate, ultimately preventing leaks, ruptures, or environmental incidents.
The key is to treat every excavation as an opportunity for proactive maintenance. Technicians should approach the task with a mindset of thoroughness, ensuring all relevant data is documented to support future analyses and regulatory reporting.

Preparation: Setting the Stage for a Safe and Effective Inspection
Before any digging begins, preparation is crucial to minimize risks and maximize the value of the inspection. Start by reviewing available pipeline data, such as installation year, material grade, outer diameter (OD), wall thickness (WT), and maximum allowable operating pressure (MAOP). This baseline information helps contextualize findings during the assessment.
Safety is paramount. Excavations involve hazards like cave ins, gas releases, or proximity to high consequence areas (near populated zones or environmentally sensitive sites). Conduct a site hazard assessment, including checking for underground utilities via one-call systems at least 48 hours in advance. Use gas detection meters to monitor for lower explosive limits (LEL), oxygen levels, and hazardous vapors. Personal protective equipment (PPE) should be standard and based on company policies as well as what may be encountered.
If the excavation is prompted by an in-line inspection (ILI) report indicating anomalies, note the reported locations, depths, and types. Schedule non-destructive testing (NDT) specialists if advanced techniques like ultrasonic testing (UT) or magnetic particle inspection (MPI) are anticipated. Finally, ensure all personnel are qualified for the tasks, with direct supervision for those in training.
Essential Tools and Equipment for the Job
Having the right tools on hand streamlines the inspection process and ensures accurate measurements. A defect assessment kit is indispensable, typically including:
Pit depth gauge for measuring corrosion depths.
Ruler, straight edge, calipers, and pipe circumference tape for dimensional assessments.
pH probe or test paper to evaluate soil or liquid acidity.
Soil resistivity probe to assess corrosivity.
Handheld UT probe with calibration block for wall thickness checks.
Voltmeter for pipe-to-soil potential readings.
Digital camera for comprehensive photo documentation.
Gas detection meter and pipeline locator for safety and positioning.
Additional items might include litmus paper for quick pH tests, rubbing paper for defect sketches, and PPE as per site requirements. Always calibrate tools before use to maintain accuracy.

Step-by-Step Procedure for Pipeline Inspection During Excavation
Once the site is prepared and safe, follow a methodical process to inspect and assess the pipeline. This ensures nothing is overlooked and provides a clear record of findings.
1. Initial Site Documentation and Excavation
Begin with photographic documentation of the site before disturbing the area. Capture upstream and downstream views, any above-ground features (e.g., landmarks or potential interference sources), and staking marks. Label photos with pipeline details like name, location, flow direction, and distance to reference points. Use GPS coordinates for location.
Excavate carefully to expose the pipe fully, adhering to trenching guidelines to prevent additional damage. If a leak is suspected, shut in the line or reduce pressure immediately, following established protocols. Monitor the atmosphere continuously with gas detectors.
2. Coating Evaluation
The coating is the first line of defense against corrosion. Identify the type (e.g., fusion-bonded epoxy, tape, or coal tar) and assess its condition. Look for holidays (gaps), disbondment, degradation, or signs of soil stress. Check for adhered sections versus those that are shielding cathodic protection.
If liquid is present under the coating, measure its pH and note any corrosion products. Document the coating's overall state as excellent, good, fair, or poor. If the coating is deteriorated, it must be removed carefully before inspecting the pipe surface. After inspection, reapply a suitable coating to restore protection.
3. Pipe Surface Inspection
With the coating removed or assessed, examine the pipe for external corrosion or defects. Note the soil type (e.g., clay, sand, rocky) and condition (wet or dry), as these influence corrosion rates. Measure soil resistivity and pH to gauge environmental aggressiveness.
Take pipe-to-soil potential readings (both DC and AC) at pipe grade and soil surface. Record distances to nearby cathodic protection sources like rectifiers or anodes. Check for foreign line crossings or indications of stray currents, which can accelerate corrosion.
Visually inspect the pipe for rust, pitting, scale, or other irregularities. If internal inspection is possible (if the pipe is cut or opened), evaluate the interior for similar issues. Use UT to measure wall thickness at multiple points, including around the circumference (at 12:00, 3:00, 6:00, and 9:00 o'clock positions).
4. Locating and Assessing Anomalies
If the excavation targets a known anomaly from ILI data, locate it using reference points like girth welds. Mark the area with a box and perform a preliminary visual assessment before full cleaning.
Clean the surface to NACE No. 2 near-white blast standard if needed for MPI or other NDT. Classify the anomaly as general corrosion, pitting, gouge, dent, crack, or manufacturing defect. Measure dimensions: length, width, depth, orientation, and distance from welds.
For corrosion, determine if it's active (shiny metal) or inactive (oxidized). Use a pit gauge for depths, assessing multiple points in clustered areas. For cracks or linear indications, employ MPI or UT shearwave for sizing.
5. Specific Defect Evaluation by Type
Different defects require tailored approaches:
External Corrosion: Clean the area and measure pit depths. Evaluate if it's preferential along seams. Calculate remaining strength using standards like Modified B31G. Check for associated stress corrosion cracking (SCC) under disbonded coatings.
Internal Corrosion: If accessible, sample deposits for microbial analysis. Note flow direction and severity. Seal samples to prevent contamination.
Selective Seam Corrosion: Common in older ERW pipes; measure along the seam and consult engineering for severity.
Stress Corrosion Cracking: Inspect with MPI in suspect areas. Document crack density and length.
Mechanical Damage (Gouges/Dents): Check for cracks via MPI. Measure dent depth; buff minor gouges if under 10% WT.
Manufacturing Anomalies: Assess laminations or inclusions with UT. Buff shallow defects.
Girth Weld Defects: Use X-ray for evaluation.
Hard Spots or Buckles: Map hardness and dimensions; inspect for cracks.
In all cases, take UT measurements and photographs, labeling key details on the pipe.
6. Determining Repairs and Mitigation
Based on assessments, decide on repairs. Options include recoating, sanding, composite sleeves, clamps, or pipe replacement. For critical defects, reduce pressure temporarily per guidelines. Consult integrity engineers for fitness-for-service evaluations, especially for complex anomalies.
If no issues are found where expected, investigate further, perhaps with 360-degree scans. Always prioritize safety; if a defect poses immediate risk, halt operations.
7. Documentation and Follow-Up
Complete standardized forms capturing all data: identification details, measurements, photos, and repair actions. Include sketches and specific pictures for complex features. Submit reports promptly for database entry and review by specialists. This ensures trends are tracked, such as coating performance or cathodic protection efficacy.

Common Challenges and How to Overcome Them
Excavations can reveal unexpected issues, like anomalies deeper than reported or missing data. In such cases, locate nearby reference features and escalate to experts. Abnormal conditions, such as releases or fires, require immediate shutdown and notification protocols.
Deviating from procedures can lead to incomplete assessments or regulatory non-compliance. To avoid this, adhere strictly to steps and use checklists. Regular training keeps teams sharp on evolving best practices.
Conclusion: Building a Culture of Proactive Integrity Management
Excavating a pipeline is more than a routine task, it's a window into the health of infrastructure that supports essential industries. By gathering comprehensive data on coatings, pipe conditions, soils, and defects, technicians can drive informed decisions that extend asset life and reduce risks. This structured approach not only meets regulatory demands but also fosters a deeper understanding of corrosion mechanisms, ultimately contributing to safer, more reliable operations.
Roberts Corrosion Services, LLC
Established in 2011, Roberts Corrosion Services, LLC delivers comprehensive, turn-key cathodic protection and corrosion control solutions nationwide. Our end-to-end expertise encompasses design and inspection, installation and repair, surveys and remedial work. We provide drilling services for deep anode installations and a full laboratory for analysis of samples and corrosion coupons, as well as custom CP Rectifier manufacturing.
While our initial focus was on the Appalachian Basin area, we complete field work all over the US. We are a licensed contractor in many states and can complete a wide range of services.
Our biggest strength is in our flexibility for our clients. Solutions and Results.
Let us know how we can help.
Website
LinkedIn
Location: 39.251882, -81.047440
(304) 869-4007


